Essential DIY Home Repair Tips for Beginners: Master Your Fixes with Ease

Essential DIY Home Repair Tips for Beginners: Master Your Fixes with Ease

Are you ready to take charge of your home maintenance but unsure of where to start?

DIY home repair tips for beginners can transform you from a novice to a confident fixer-upper, empowering you to tackle common household issues with ease.

In this guide, we’ll explore essential tools, the most common repairs every beginner should know, step-by-step instructions for effective DIY fixes, and crucial safety practices to ensure your repair endeavors are both successful and safe.

Whether you’re dealing with a leaky faucet or a squeaky door, these tips will help you navigate the world of home repairs like a pro.

Pop by Uncle John’s Emporium for some original designs and gift ideas.

Essential DIY Home Repair Tips for Beginners: Master Your Fixes with Ease

Key Takeaways

  • Familiarize yourself with basic tools and their specific uses before starting any DIY project.
  • Learn to tackle common repairs like fixing leaky faucets or patching drywall to build your confidence.
  • Follow a step-by-step guide to ensure you complete your DIY fixes efficiently and correctly.
  • Always prioritize safety by wearing protective gear and following best practices during repairs.
  • Start with small projects to gradually develop your DIY skills and tackle more complex home repairs.

Understanding Basic Tools and Their Uses

When it comes to tackling home improvement tasks, having a solid grasp of basic tools and their uses is essential for any beginner looking to implement DIY home repair tips.

Familiarity with common tools can empower you to handle a range of projects, from fixing a leaky faucet to assembling furniture.

For instance, a screwdriver may seem simple, but knowing the difference between Phillips and flathead types can greatly enhance your efficiency.

Similarly, a tape measure is crucial for ensuring precise cuts and installations, while a utility knife can assist in various cutting tasks around the house.

By mastering these fundamental tools, you not only streamline your home repair efforts but also build the confidence needed to take on more complex projects as you gain experience with DIY home repair tips for beginners.

Common Home Repairs Every Beginner Should Know

Homeownership often comes with a unique set of challenges, and knowing some essential repairs can save you time and money.

Here are some valuable DIY home repair tips for beginners that cover common issues every homeowner should be ready to tackle.

Starting with plumbing, learn how to fix a leaky faucet by replacing washers or O-rings; it’s a simple task that can prevent water waste.

For electrical repairs, knowing how to change a light switch or outlet is crucial and can enhance safety and functionality in your home.

You can address minor wall damage with easy patching techniques or touch-up paint to keep your space looking fresh.

Additionally, learn how to unclog a drain with a plunger or a simple snake tool, as plumbing problems are among the most common household issues.

By familiarizing yourself with these basic DIY home repair tips, you’ll not only boost your confidence but also develop a skill set that enhances your home’s value and your enjoyment of it.

‘The best way to predict the future is to invent it.’ – Alan Kay

Pop by Uncle John’s Emporium for some original designs and gift ideas.

Step-by-Step Guide to Essential DIY Fixes

Step-by-Step Guide to Essential DIY Fixes

If you’re looking to enhance your home without breaking the bank, knowing some DIY home repair tips for beginners can be incredibly valuable.

First, start with small projects to build your confidence.

Begin by fixing leaky faucets: turn off the water supply, disassemble the faucet, replace the washer, and reassemble it.

Next, tackle squeaky doors by applying lubricating oil to the hinges – this quick fix can eliminate annoying noises in seconds.

Don’t overlook wall scratches; you can easily patch them using spackle and a putty knife, then paint over the area for a seamless finish.

For more complex tasks, like repairing drywall, consider watching online tutorials; these resources can guide you step-by-step.

Once you’ve conquered these basic repairs, you’ll likely feel empowered to tackle even bigger projects, saving money on professional services and enhancing your DIY skills along the way.

Safety Tips and Best Practices for DIY Repairs

Embarking on DIY home repairs can be a rewarding endeavor, especially for beginners eager to learn.

However, ensuring safety should always be a top priority.

Here are vital diy home repair tips for beginners to keep in mind.

Firstly, always wear appropriate protective gear—safety goggles, gloves, and masks—when handling tools or materials.

Secondly, read all instruction manuals and tutorials thoroughly before starting any project to understand the processes involved.

Moreover, ensure you have the right tools for the job; using improper tools not only complicates tasks but also increases the risk of accidents.

Organize your workspace to minimize clutter, making it easier to move around and reducing the likelihood of tripping over items.

Additionally, if you’re inexperienced with certain repairs, consider consulting a more experienced DIYer or watching tutorial videos for guidance—this can significantly enhance your skills and confidence.

Finally, remember to take your time; rushing through repairs can lead to mistakes and injuries.

By following these diy home repair tips for beginners, you can enhance your home improvement journey while ensuring your safety and wellbeing.

Frequently Asked Questions

What basic tools do I need to start with DIY home repairs?

As a beginner, you’ll need some essential tools including a hammer, screwdrivers (both flat and Phillips), pliers, a tape measure, utility knife, a level, and a cordless drill.

These will allow you to tackle most common repairs.

What are some common home repairs that beginners can handle?

Some common repairs include fixing leaky faucets, patching drywall, replacing light fixtures, unclogging drains, and painting walls.

These tasks are typically manageable for beginners.

Can you provide a step-by-step guide for a simple DIY repair?

Sure!

For a leaking faucet, first turn off the water supply, then remove the handle to access the cartridge.

Replace any worn washers or O-rings, reassemble the faucet, and turn the water back on to check for leaks.

What safety tips should I keep in mind while doing DIY repairs?

Always wear safety gear such as gloves and goggles, ensure the work area is well-lit, read instruction manuals carefully, and don’t hesitate to ask for help if you’re unsure about a task.

Where can I find more DIY home repair resources tailored for beginners?

There are many online platforms, including YouTube channels, DIY blogs, and home improvement forums that offer tutorials and advice specifically for beginners looking to improve their repair skills.

[color=rgb(110, 109, 109)][highlight=rgb(247, 247, 247)]Note: This post was created using AI-assisted research and written in my own words. I don’t claim personal experience unless stated. Learn How [/highlight][/color][color=rgb(59, 59, 59)][highlight=rgb(247, 247, 247)]Things Work Around Here[/highlight][/color]

Budget-Friendly Tips: How to Plan a Kitchen Remodel Under £500

Budget-Friendly Tips: How to Plan a Kitchen Remodel Under £500

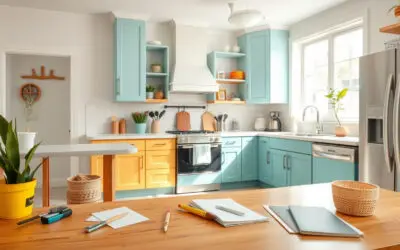
Are you dreaming of a kitchen remodel but worried about your budget?

You’re not alone!

Many homeowners want to refresh their kitchen space without breaking the bank.

In this article, we’ll explore how to plan a kitchen remodel under £500.

From assessing your current kitchen to smart shopping for materials, we’ll provide you with effective strategies to transform your cooking space economically.

Let’s dive into these practical tips to help you achieve the kitchen of your dreams while keeping your expenses in check!

Pop by Uncle John’s Emporium for some original designs and gift ideas.

Budget-Friendly Tips: How to Plan a Kitchen Remodel Under £500

Key Takeaways

  • Assess your current kitchen to identify necessary changes before starting your remodel.
  • Create a detailed budget to allocate the £500 effectively for maximum impact.
  • Consider DIY projects as a way to save money while giving your kitchen a fresh look.
  • Research and shop smart by looking for deals and discounts on kitchen materials.
  • Prioritize essential updates that enhance functionality and aesthetics within your budget.

Assessing Your Current Kitchen: Determining What Needs to Change

When considering a kitchen remodel, especially on a budget of under £500, it’s crucial to start by assessing your current kitchen setup.

Begin by examining the layout, fixtures, and appliances to determine what is functional and what needs improvement.

Look for elements that may be outdated or inefficient, such as old cabinets or a worn countertop.

Taking detailed notes on what works and what doesn’t can help prioritize changes.

Furthermore, consider the kitchen’s workflow, which includes the relationship between the sink, stove, and refrigerator.

By identifying these key areas, you’ll be able to plan enhancements that not only align with your budget but also significantly improve the functionality and aesthetic of your kitchen space.

Creating a Detailed Budget: Allocating Your £500 Wisely

When considering how to plan a kitchen remodel under £500, creating a detailed budget is essential to ensure every penny is utilized effectively.

Start by listing all the elements you wish to update—a fresh coat of paint, new cabinet hardware, or perhaps even a mini backsplash.

Assign a specific portion of your budget to each item based on its importance and potential impact on the kitchen’s aesthetic and functionality.

For example, allocate funds for paint and tools if your goal is to refresh the space with a new color scheme.

Be strategic; consider DIY options to save on labor costs, allowing you to stretch your budget further.

Utilize comparison shopping for materials, sourcing local discounts or even second-hand finds to maximize your resources.

Finally, don’t forget to set aside a small emergency fund within your budget to handle any unforeseen expenses.

By following these strategies, you’ll ensure that every aspect of your kitchen remodel is well-thought-out and executed within your £500 limit.

‘The best way to predict the future is to create it.’ – Peter Drucker

Pop by Uncle John’s Emporium for some original designs and gift ideas.

DIY Projects: Cost-Effective Solutions for a Fresh Look

DIY Projects: Cost-Effective Solutions for a Fresh Look

When considering a kitchen remodel, many homeowners often find themselves worried about breaking the bank.

However, with a little creativity and strategic planning, it is entirely possible to achieve a fresh new look for your kitchen while keeping the budget under £500.

To successfully plan a kitchen remodel under £500, start by assessing your current space and identifying areas that could benefit from an update.

Simple changes like painting cabinets, replacing hardware, or installing new lighting fixtures can make a significant impact without extensive costs.

Additionally, consider DIY projects like creating a backsplash using peel-and-stick tiles or repurposing old furniture into functional kitchen islands.

Online resources and community workshops can also provide valuable guidance on techniques and materials.

By prioritizing your needs, making informed choices, and embracing a DIY mindset, you can transform your kitchen into a stylish and functional space, all while staying within your budget.

Smart Shopping: Finding Deals and Discounts on Materials

Planning a kitchen remodel under £500 can seem daunting, but smart shopping can significantly help you achieve your goals without breaking the bank.

Begin by setting a clear budget and identifying which materials you need to update.

Focus on high-impact areas such as cabinets, countertops, and lighting fixtures.

Utilize online platforms and local retailers to find unbeatable deals and discounts on essential materials.

Websites like eBay, Facebook Marketplace, and local DIY stores often have clearance sections or weekend sales that can provide substantial savings.

Additionally, consider thrift stores or second-hand shops for unique finds that can add character to your kitchen.

Be strategic in your purchases by comparing prices and looking for sales events that coincide with your needs.

By leveraging these tips on how to plan a kitchen remodel under £500, you’ll be able to create a beautiful space that enhances your home without overspending.

Frequently Asked Questions

What are the first steps to assess my current kitchen for a remodel under £500?

Start by evaluating the functionality and aesthetic of your kitchen.

Identify problem areas such as outdated fixtures, inefficient layouts, or worn surfaces.

Make a list of necessary changes and prioritize them based on your budget.

How can I create a detailed budget for my kitchen remodel?

Break down your £500 into specific categories such as materials, tools, and decor.

Decide on a maximum amount for each category, and leave a small portion for unexpected expenses.

Research costs online or at local stores to make informed decisions.

What are some cost-effective DIY projects I can consider for my kitchen remodel?

Look into repainting cabinets, adding a backsplash with peel-and-stick tiles, or replacing cabinet hardware.

You can also repurpose old furniture or create open shelving with inexpensive materials for a fresh look.

Where can I find deals and discounts on kitchen remodel materials?

Check local thrift stores, online marketplaces, and hardware store sales for discounted materials.

Sign up for newsletters from home improvement retailers for exclusive deals, and consider joining local community groups where people give away or sell leftover materials.

Is it possible to remodel my kitchen under £500 without sacrificing quality?

Yes, by carefully planning and prioritizing DIY projects, you can achieve quality results on a budget.

Focus on small yet impactful changes and ensure you use durable materials.

Be resourceful in sourcing supplies to maximize your budget.

[color=rgb(110, 109, 109)][highlight=rgb(247, 247, 247)]Note: This post was created using AI-assisted research and written in my own words. I don’t claim personal experience unless stated. Learn How [/highlight][/color][color=rgb(59, 59, 59)][highlight=rgb(247, 247, 247)]Things Work Around Here[/highlight][/color]

10 Simple DIY Decor Ideas for Kitchens That Will Transform Your Space

10 Simple DIY Decor Ideas for Kitchens That Will Transform Your Space

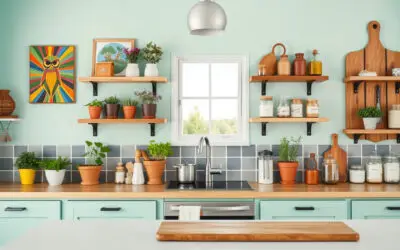
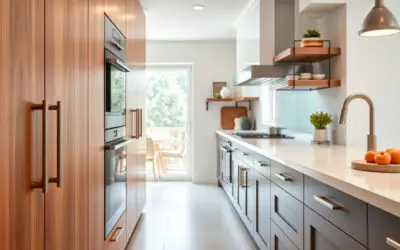
Are you looking to breathe new life into your kitchen without breaking the bank?

Our collection of simple DIY decor ideas for kitchens is the perfect starting point!

Whether you want to showcase your personality with creative wall art, upcycle furniture for stylish storage, or keep things organized with functional decor, these ideas are both budget-friendly and impactful.

Plus, seasonal accents can help you maintain a fresh vibe in your cooking space all year round.

Read on to discover how you can transform your kitchen into a space that reflects your style and enhances your cooking experience!

Pop by Uncle John’s Emporium for some original designs and gift ideas.

10 Simple DIY Decor Ideas for Kitchens That Will Transform Your Space

Key Takeaways

  • Incorporating creative wall art adds a personal touch to your kitchen decor.
  • Upcycling old furniture can provide stylish storage solutions in your kitchen.
  • Using stylish baskets and jars not only decorates but also organizes your kitchen.
  • Seasonal accents can easily refresh the look of your kitchen throughout the year.
  • DIY decor ideas provide an affordable and personalized way to enhance your kitchen space.

1. Creative Wall Art: Adding Personal Touches to Your Kitchen

When it comes to transforming your kitchen into a space that truly reflects your personality, simple DIY decor ideas for kitchens can make a significant impact.

One of the most effective ways to achieve this is through creative wall art.

Adding personal touches, such as framed recipes, family photographs, or even your children’s artwork can infuse warmth and character into your kitchen.

Consider using simple frames or canvas boards to showcase these cherished pieces.

Additionally, you can get crafty by painting or stenciling directly onto the walls or cabinets, allowing for a unique design that becomes the centerpiece of your culinary space.

With just a few materials and some creativity, you can curate a gallery of wall art that not only beautifies your kitchen but also serves as a conversation starter for family and friends.

2. Upcycling Furniture: Transforming Old Pieces into Stylish Storage

Upcycling furniture is a fantastic way to incorporate simple DIY decor ideas for kitchens while also giving new life to old pieces.

Instead of discarding that outdated cabinet or chair, consider repurposing it into stylish storage solutions that reflect your aesthetic.

Start by sanding down the wood, applying a fresh coat of paint, or even experimenting with vibrant wallpaper to reinvigorate its appearance.

Add some functional elements, like hooks for hanging kitchen tools or open shelves for displaying charming dishware, to enhance both practicality and design.

Not only does this creative approach minimize waste, but it also allows you to craft a kitchen environment that is both inviting and unique, embodying your personal style through thoughtful, eco-friendly choices.

‘Simplicity is the ultimate sophistication.’ – Leonardo da Vinci

Pop by Uncle John’s Emporium for some original designs and gift ideas.

3. Functional Decor: Organizing with Stylish Baskets and Jars

3. Functional Decor: Organizing with Stylish Baskets and Jars

When it comes to enhancing your kitchen space, functional decor can play a pivotal role in maintaining organization while adding a touch of style.

One of the most effective and aesthetically pleasing simple DIY decor ideas for kitchens involves the use of stylish baskets and jars.

These storage solutions not only keep your counters tidy by neatly housing everything from fresh produce to kitchen utensils, but they also serve as beautiful decor accessories.

Opt for wicker or woven baskets as a rustic choice, or choose clear glass jars to showcase colorful ingredients like pasta or spices.

By incorporating these elements, you can create a cohesive and welcoming atmosphere that speaks both to functionality and design, transforming your kitchen into an organized and inviting space.

4. Seasonal Accents: Changing Decor with the Seasons for a Fresh Look

Changing your kitchen decor with the seasons can breathe new life into one of the most frequented spaces in your home.

Simple DIY decor ideas for kitchens can easily transform your space and reflect the beauty of each season.

For spring, consider using floral patterns in table runners or making a cheerful centerpiece with fresh flowers in mason jars.

As summer approaches, switch out heavier fabrics for light, airy colors, and add a pop of brightness with citrus-themed decor items.

During the fall, embrace the warm tones of the season with easy DIY projects such as creating a rustic wreath made from twigs and autumn leaves.

Finally, for winter, a simple yet elegant touch could be adding string lights to your kitchen window or crafting holiday-themed art pieces that bring warmth to the chilly months.

By utilizing these simple DIY decor ideas for kitchens, you can effortlessly keep your space looking fresh and inviting all year round.

Frequently Asked Questions

What are some easy DIY decor ideas I can implement in my kitchen?

You can start by creating some creative wall art, upcycling old furniture, organizing with stylish baskets and jars, and adding seasonal accents to refresh your kitchen’s look.

How can I personalize my kitchen decor?

Consider adding personal touches through creative wall art such as framed prints, photos, or homemade pieces that reflect your style and personality.

What are some practical uses for baskets and jars in kitchen decor?

Baskets and jars can be used not just for decoration but also for organizing kitchen items like utensils, spices, or fresh produce, blending functionality with style.

How do I upcycle furniture for my kitchen?

Look for old furniture pieces like stools or cabinets that can be sanded, painted, or repurposed to create stylish storage solutions tailored to your kitchen’s needs.

Can I change my kitchen decor seasonally without a lot of effort?

Yes!

Incorporating seasonal accents like themed decor or seasonal colors can easily refresh your kitchen’s look with minimal effort.

[color=rgb(110, 109, 109)][highlight=rgb(247, 247, 247)]Note: This post was created using AI-assisted research and written in my own words. I don’t claim personal experience unless stated. Learn How [/highlight][/color][color=rgb(59, 59, 59)][highlight=rgb(247, 247, 247)]Things Work Around Here[/highlight][/color]

Transform Your Kitchen with Stunning DIY Countertops on a Budget

Transform Your Kitchen with Stunning DIY Countertops on a Budget

Are you ready to give your kitchen a facelift without breaking the bank?

If so, transforming your kitchen with stunning DIY countertops on a budget can be the perfect solution.

With the right materials, tools, and a bit of creativity, you can create countertops that not only enhance the aesthetic of your space but also reflect your personal style.

In this article, we will dive into understanding the basics of DIY countertops, explore budget-friendly materials, provide a comprehensive step-by-step guide to crafting your own countertops, and share essential finishing touches and maintenance tips to ensure your project stands the test of time.

Let’s get started!

Pop by Uncle John’s Emporium for some original designs and gift ideas.

Transform Your Kitchen with Stunning DIY Countertops on a Budget

Key Takeaways

  • DIY countertops can be a cost-effective way to enhance your kitchen’s appearance.
  • Choosing the right materials is crucial for creating sturdy and attractive countertops.
  • Follow a detailed step-by-step guide to ensure your DIY project runs smoothly.
  • Finishing touches can elevate the look of your countertops while protecting them from wear.
  • Regular maintenance will help preserve the beauty and functionality of your DIY countertops.

Understanding the Basics of DIY Countertops

Creating stunning countertops doesn’t have to break the bank; in fact, many DIY enthusiasts are discovering innovative ways to make appealing surfaces without spending a fortune.

Understanding the basics of DIY countertops is essential for anyone looking to embark on this rewarding project, especially when focusing on DIY countertops on a budget.

First, it’s crucial to choose the right materials that not only fit your budget but also complement your home’s aesthetic.

Options like laminate, concrete, and reclaimed wood provide excellent choices that balance affordability with style.

Next, plan your project meticulously—measure your surfaces, sketch your designs, and gather your tools before diving in.

By taking the time to understand the foundational elements of DIY countertops, including proper installation techniques and finishing touches, you can achieve professional-looking results while keeping costs low.

Materials and Tools Needed for Budget-Friendly Countertops

Creating diy countertops on a budget can be both rewarding and cost-effective, allowing homeowners to achieve a fresh look in their kitchens or bathrooms without breaking the bank.

To embark on this DIY adventure, it’s essential to gather the right materials and tools.

Start with a sturdy base, such as plywood or MDF (medium-density fiberboard), which can serve as the foundation for your countertop.

You’ll also need a selection of decorative materials to elevate the aesthetics—options like laminate sheets, butcher block, or even repurposed wood can provide a stylish finish.

For tools, ensure you have a circular saw or jigsaw for cutting, a drill for assembling, and sandpaper for achieving a smooth surface.

Additionally, adhesives and sealants are crucial for ensuring durability and longevity.

With these materials and tools at your disposal, you can confidently create stunning and functional diy countertops on a budget.

‘Your home is living space, not a storage space.’ – Frances Mayes

Pop by Uncle John’s Emporium for some original designs and gift ideas.

Step-by-Step Guide to Creating Your DIY Countertops

Step-by-Step Guide to Creating Your DIY Countertops

Are you looking to elevate your kitchen or bathroom without breaking the bank?

Creating DIY countertops on a budget is not only a cost-effective solution but also a rewarding project that enhances your home’s aesthetic appeal.

Follow this step-by-step guide to crafting your very own countertops that are both functional and stylish.

Start by selecting the materials that fit your budget—options like plywood, laminate, or concrete can provide beauty and durability.

Next, measure your existing countertop space accurately to ensure a perfect fit.

Once you have your materials, prepare the surface by sanding and sealing it to prevent damage.

Assemble the pieces according to your design choice, and finally, finish with a coat of paint or sealant to add that polished touch.

With some creativity and elbow grease, you can enjoy stunning DIY countertops on a budget that showcase your personal style!

Finishing Touches and Maintenance Tips for Long-lasting Results

When it comes to creating beautiful DIY countertops on a budget, the finishing touches are essential for achieving a professional look and ensuring longevity.

Start by sanding your countertops to achieve a smooth surface, which can dramatically enhance the overall appearance.

Next, applying a protective sealant is crucial; it not only guards against stains and spills but also helps maintain the integrity of your materials over time.

For wooden countertops, a food-safe mineral oil can keep the wood hydrated and looking fresh while preventing warping.

Alternatively, for concrete or laminate finishes, consider a polyurethane sealant for durable protection.

Regular maintenance, such as cleaning with gentle soap and water and avoiding harsh chemicals, will further extend the life of your DIY countertops.

With the right care, your budget-friendly project can shine for years to come, marrying affordability with style.

Frequently Asked Questions

What materials are best for budget-friendly DIY countertops?

Some of the best materials for budget-friendly DIY countertops include plywood, laminate, concrete, and recycled wood.

Each material has its own unique aesthetic and durability, so choose based on your style and needs.

How can I ensure my DIY countertops are durable?

To ensure durability, use high-quality sealants and finishes, maintain a clean workspace, and follow the installation guidelines carefully.

Regular maintenance, such as resealing when necessary, will also help prolong the life of your countertops.

Can I install DIY countertops by myself?

Yes!

DIY countertops can be installed by individuals without professional experience as long as you carefully follow the step-by-step guide provided.

However, having an extra set of hands can be helpful for larger projects.

What are some common mistakes to avoid when making DIY countertops?

Common mistakes include not taking accurate measurements, using low-quality materials, overlooking proper sealing techniques, and failing to account for drying times.

Careful planning and thorough execution will help you avoid these pitfalls.

How do I maintain my DIY countertops once they are installed?

To maintain your DIY countertops, clean them regularly with mild soap and water, avoid harsh chemicals, and reapply sealants or finishes as needed based on wear and tear.

Regular maintenance will keep your countertops looking stunning for years.

[color=rgb(110, 109, 109)][highlight=rgb(247, 247, 247)]Note: This post was created using AI-assisted research and written in my own words. I don’t claim personal experience unless stated. Learn How [/highlight][/color][color=rgb(59, 59, 59)][highlight=rgb(247, 247, 247)]Things Work Around Here[/highlight][/color]

10 Budget-Friendly Kitchen Flooring Ideas That Transform Your Space

10 Budget-Friendly Kitchen Flooring Ideas That Transform Your Space

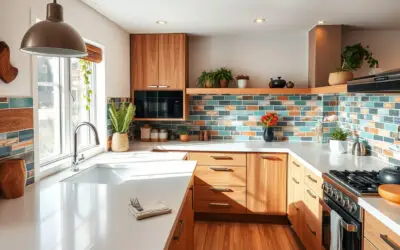
When it comes to home renovation, one of the most impactful changes you can make is to your kitchen flooring.

Not only does the right flooring tie the entire look of your kitchen together, but it also sets the tone for your cooking and gathering spaces.

However, many homeowners shy away from flooring upgrades due to concerns about cost.

The good news is that there are numerous budget-friendly kitchen flooring ideas that can transform your space without breaking the bank.

In this article, we will explore ten affordable flooring options, creative DIY solutions, and essential tips for choosing the right flooring for your kitchen, making it easy to revamp your home on a budget.

Pop by Uncle John’s Emporium for some original designs and gift ideas.

10 Budget-Friendly Kitchen Flooring Ideas That Transform Your Space

Key Takeaways

  • Budget-friendly flooring can significantly enhance the look of your kitchen without breaking the bank.
  • The article highlights ten affordable flooring options suitable for various kitchen styles.
  • Creative DIY solutions are available to transform your kitchen floors while saving costs.
  • Selecting the right flooring involves considering durability, aesthetics, and maintenance needs.
  • Investing time in research can lead to delightful and economical flooring choices for your kitchen.

1. Introduction to Budget-Friendly Kitchen Flooring

When it comes to home renovations, the kitchen is often at the top of the list, and one of the major decisions that can significantly impact both aesthetics and functionality is flooring.

For those on a tight budget, finding stylish yet affordable options is crucial.

In this article, we’ll explore a variety of budget-friendly kitchen flooring ideas that cater to different tastes and lifestyles without breaking the bank.

From durable vinyl and laminate to the timeless appeal of tile, these options not only enhance the beauty of your kitchen but also provide practical solutions for everyday wear and tear.

Whether you’re a DIY enthusiast or looking for something that can be easily installed by a professional, there’s a perfect budget-friendly flooring solution for every home.

Let’s dive into some inspiring ideas that combine quality and cost-effectiveness.

2. Top 10 Affordable Flooring Options

When it comes to remodeling a kitchen, selecting the right flooring can be a daunting task, especially if you’re working with a tight budget.

Thankfully, there are plenty of budget-friendly kitchen flooring ideas that combine style and durability without breaking the bank.

Here’s a list of the top 10 affordable flooring options to consider.


1.

Vinyl Flooring – Known for its resilience and versatility, vinyl flooring is available in a myriad of styles that mimic hardwood, tile, and stone at a fraction of the cost.

2.

Laminate Flooring – Offering the look of real wood or stone for less, laminate flooring is easy to install and maintain, making it an ideal choice for budget-conscious homeowners.

3.

Cork Flooring – Eco-friendly and cork provides a warm and cushioned surface underfoot.

Its natural properties also make it resistant to mold and mildew, perfect for kitchen environments.

4.

Bamboo Flooring – Strong and sustainable, bamboo is a chic option that is often more affordable than traditional hardwood, perfect for creating a modern kitchen aesthetic.

5.

Sheet Vinyl – Seamless and cost-effective, sheet vinyl can cover large areas easily, making it a great choice for expansive kitchen spaces without the hassle of multiple seams.

6.

Porcelain or Ceramic Tile – Although slightly more of an investment upfront, discount porcelain or ceramic tiles offer unparalleled durability and versatility, with countless designs to enhance your kitchen decor.

7.

Concrete Flooring – Increasingly popular for its industrial look, stained or polished concrete offers a unique aesthetic while being durable and inexpensive to install.

8.

Peel-and-Stick Tiles – An innovative and simple DIY solution, peel-and-stick tiles can transform your kitchen’s look in no time and at a very low cost, ideal for renters or budget renovations.

9.

Reclaimed Wood – For a rustic charm, using reclaimed wood for flooring is not only an eco-friendly choice but also adds character and warmth, often at a lower price point than new hardwood.

10.

Linoleum Flooring – A traditional yet stylish choice, linoleum comes in a variety of colors and patterns, making it a solid option for joyful kitchen designs on a budget.

Incorporating these budget-friendly kitchen flooring ideas into your remodel can help create a beautiful, functional space without emptying your wallet.

‘The best way to predict the future is to create it.’ – Peter Drucker

Pop by Uncle John’s Emporium for some original designs and gift ideas.

3. Creative DIY Flooring Solutions

3. Creative DIY Flooring Solutions

When it comes to refreshing your kitchen, finding budget-friendly kitchen flooring ideas can be a game-changer.

One creative DIY solution is to use peel-and-stick vinyl tiles.

These tiles come in a variety of designs and colors, making them a perfect choice for those looking to add a stylish flair without overspending.

Another option is to paint your existing floorboards with a durable floor paint; this method not only transforms the appearance but also helps in sealing and protecting the wood.

For an eco-friendly alternative, consider repurposing old pallets to create a rustic wood floor.

With some creativity and elbow grease, these DIY flooring solutions can revamp your kitchen space while staying within budget.

4. Tips for Choosing the Right Flooring for Your Kitchen

Choosing the right flooring for your kitchen can significantly enhance both the functionality and aesthetic appeal of the space.

When searching for budget friendly kitchen flooring ideas, consider materials that balance durability with cost-effectiveness.

Vinyl flooring is a popular choice due to its affordability and variety of designs, resembling more expensive materials like wood or tile.

Laminate flooring is another budget-friendly option that offers resilience and easy installation, making it suitable for busy kitchens.

Additionally, ceramic tiles can be a cost-efficient investment, especially with various styles available, ensuring you can find something that fits your decor.

Remember to factor in longevity and maintenance when making your choice, as a slightly higher upfront cost for certain materials may save you money in the long run.

Lastly, don’t forget to check for any sales or discounts at local home improvement stores, as these can further enhance your ability to create a beautiful kitchen space without breaking the bank.

Frequently Asked Questions

What are some budget-friendly kitchen flooring ideas?

Some budget-friendly kitchen flooring ideas include laminate, vinyl planks, tile, cork, and painted plywood.

These options are affordable and can significantly enhance your kitchen’s aesthetic.

Can I find DIY options for kitchen flooring on a budget?

Yes!

Creative DIY solutions like painting existing floors or installing peel-and-stick vinyl tiles are great ways to upgrade your kitchen flooring without spending much.

What factors should I consider when choosing kitchen flooring?

When selecting kitchen flooring, consider durability, maintenance, water resistance, comfort, and style.

These factors will ensure your flooring meets the demands of a kitchen environment.

Are there flooring options that are easy to install myself?

Absolutely!

Options like laminate flooring, vinyl planks, and cork often come with user-friendly installation systems, making it easier for DIY enthusiasts to install them without professional help.

Where can I find budget-friendly flooring materials?

You can find budget-friendly flooring materials at home improvement stores, flooring specialty shops, and online retailers.

Don’t forget to check for sales, discounts, and clearance items for the best deals.

[color=rgb(110, 109, 109)][highlight=rgb(247, 247, 247)]Note: This post was created using AI-assisted research and written in my own words. I don’t claim personal experience unless stated. Learn How [/highlight][/color][color=rgb(59, 59, 59)][highlight=rgb(247, 247, 247)]Things Work Around Here[/highlight][/color]

Transform Your Kitchen: A Step-by-Step Guide on How to Update Handles and Knobs

Transform Your Kitchen: A Step-by-Step Guide on How to Update Handles and Knobs

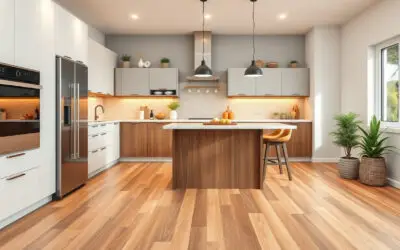
Updating your kitchen handles and knobs can significantly enhance the overall aesthetic of your cooking space, providing a fresh and modern look without the need for a complete remodel.

Whether you want to match new appliances or simply bring a dash of personality to your cabinets, learning how to update kitchen handles and knobs is a straightforward yet impactful endeavor.

In this guide, we will walk you through the process, exploring different types of handles and knobs, preparing your kitchen for the makeover, and providing you with a detailed step-by-step approach.

Plus, we’ll include some maintenance tips to keep your new hardware looking pristine for years to come.

Pop by Uncle John’s Emporium for some original designs and gift ideas.

Transform Your Kitchen: A Step-by-Step Guide on How to Update Handles and Knobs

Key Takeaways

  • Explore various styles of kitchen handles and knobs to find the perfect match for your decor.
  • Prepping your kitchen is essential for a smooth and efficient renovation process.
  • Follow a step-by-step guide to successfully replace your kitchen handles and knobs with ease.
  • Incorporate finishing touches to enhance the overall look after updating your hardware.
  • Learn maintenance tips to keep your new handles and knobs looking great for years to come.

Understanding Different Types of Kitchen Handles and Knobs

Updating your kitchen handles and knobs can significantly enhance the aesthetics and functionality of your kitchen.

There are various types of kitchen handles and knobs to consider, each offering unique benefits.

For instance, traditional knobs are often round and can provide a classic feel, while pull handles are longer and may be more ergonomic for gripping.

If you’re looking to give your space a modern twist, consider sleek, minimalist designs in materials like stainless steel or matte black.

Additionally, ornate and decorative options can add a touch of elegance if you’re aiming for a more vintage-inspired look.

Understanding these different types of kitchen handles and knobs is crucial when learning how to update kitchen handles and knobs, ensuring that your choices align with your overall kitchen design vision.

Don’t forget to consider the finish and color that will complement your cabinetry, as well as the ease of installation, which can vary based on the handle type you choose.

Preparing Your Kitchen for a Makeover

When it comes to rejuvenating your kitchen, one of the most impactful yet simple changes you can make is updating the hardware.

Knowing how to update kitchen handles and knobs can dramatically enhance the aesthetics of your space without breaking the bank.

Start by assessing your current handles and knobs – are they outdated or damaged?

Choose a design and finish that complements your cabinetry and overall kitchen style, whether it’s modern, rustic, or classic.

With a few tools like a screwdriver and measuring tape, removing old hardware and installing the new pieces can be a straightforward DIY project.

Remember, the right handles and knobs not only provide functional benefits but also serve as stylish accents that tie your entire kitchen look together.

Before you dive into your kitchen makeover, ensure that you have all necessary supplies handy and take accurate measurements to streamline the process.

‘The kitchen is the heart of the home, and just like any heart, it deserves to look and feel amazing.’ – Unknown

Pop by Uncle John’s Emporium for some original designs and gift ideas.

Step-by-Step Process for Updating Handles and Knobs

Step-by-Step Process for Updating Handles and Knobs

Updating your kitchen handles and knobs is a simple yet impactful way to breathe new life into your culinary space.

If you’re wondering how to update kitchen handles and knobs effectively, follow this step-by-step guide to achieve a stunning transformation.

Start by choosing the right style and finish that complements your kitchen decor.

Next, gather necessary tools such as a screwdriver, measuring tape, and a level.

Begin the process by removing the old handles and knobs; ensure to keep screws in a safe place for potential reuse.

Measure the distance between screw holes to select new hardware that fits perfectly.

Once the new handles are ready, mark the locations for installation accurately, using your level to ensure alignment.

Finally, secure your new knobs and handles, making sure everything is tightly fastened.

With these straightforward steps, you will not only enhance the aesthetics of your kitchen but also improve functionality.

Additionally, regularly updating kitchen handles and knobs can offer a cost-effective way to maintain your home’s value.

Finishing Touches and Maintenance Tips

When it comes to updating your kitchen, one of the most impactful yet often overlooked aspects is how to update kitchen handles and knobs.

These small hardware pieces can drastically change the look and feel of your cabinets and drawers, creating a fresh vibe without the need for a full renovation.

To begin, choose handles and knobs that complement your kitchen’s style—whether that’s modern, farmhouse, or classic.

For a cohesive look, consider finishes that match your appliances or fixtures.

Once you’ve selected your new hardware, ensure you measure the existing holes to avoid unnecessary drilling.

When installing, check that each handle is level and properly aligned; this not only enhances the aesthetic but also prolongs the lifespan.

Finally, maintaining these fixtures is crucial; regular cleaning with a suitable non-abrasive cleaner, along with periodic checks for looseness, will keep your kitchen looking stunning for years to come.

By focusing on how to update kitchen handles and knobs, you can achieve a remarkable transformation that is both stylish and functional.

Frequently Asked Questions

What types of handles and knobs are available for kitchen cabinets?

There are various types of kitchen handles and knobs, including traditional knobs, pull handles, cup pulls, and bar handles.

Each style varies in design, functionality, and ease of use.

How do I prepare my kitchen for updating handles and knobs?

To prepare your kitchen, start by removing existing handles and knobs, cleaning the surface of the cabinets, and measuring the spacing between holes to ensure a proper fit for the new hardware.

What is the step-by-step process for updating kitchen handles and knobs?

1.

Remove old handles and knobs.

2.

Clean the cabinet surfaces.

3.

Measure and mark the placement for new hardware.

4.

Install new handles and knobs, ensuring they are secure.

5.

Clean up any debris and enjoy your updated kitchen.

Are there any maintenance tips for keeping new kitchen handles and knobs looking great?

To maintain your new kitchen handles and knobs, regularly clean them with a soft cloth and mild cleaner, avoid using abrasive materials, and periodically check screws to ensure they are tight.

Can I update my kitchen handles and knobs myself, or should I hire a professional?

Updating kitchen handles and knobs can typically be a DIY project if you have basic tools and skills.

However, if you’re uncertain or uncomfortable with the process, hiring a professional is always a good option.

[color=rgb(110, 109, 109)][highlight=rgb(247, 247, 247)]Note: This post was created using AI-assisted research and written in my own words. I don’t claim personal experience unless stated. Learn How [/highlight][/color][color=rgb(59, 59, 59)][highlight=rgb(247, 247, 247)]Things Work Around Here[/highlight][/color]