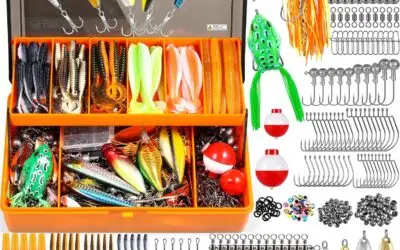
For anglers seeking to boost their catch and explore a wide variety of lures without breaking the bank, the Topconcpt 275-Piece Fishing Lure Kit...

Catch More Fish: Unleashing the Topconcpt 275-Piece Fishing Lure Kit!
read more
For anglers seeking to boost their catch and explore a wide variety of lures without breaking the bank, the Topconcpt 275-Piece Fishing Lure Kit...

Renovating your kitchen can often feel overwhelming, especially when you're faced with a tight budget.However, a stunning transformation doesn’t...
Fishing enthusiasts, whether beginners or seasoned anglers, know that the right gear can make all the difference on the water. The PLUSINNO 353/404...

A kitchen is often the heart of the home, serving as a gathering place for family and friends.However, transforming this essential space can seem...
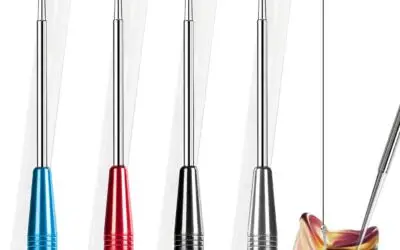
Fishing enthusiasts know that one of the trickiest parts of the sport is safely and quickly removing hooks from their catch. Whether you’re dealing...

Are you ready to embark on your next DIY adventure?Whether you're painting a room, tiling a backsplash, or building furniture, tackling a home...